You can create and restore backups of your websites and databases by using the Backup Wizard option from the cPanel on your Linux Hosting order.
You can choose to create a full backup or a partial backup of your website.
Step 1: Accessing the Backup Wizard.
- Access your cPanel from the control panel.
- On the cPanel home page, under the FILES section, click Backup Wizard.

Step 2: Creating and Restoring a Backup.
You can choose from the backup options available in the cPanel. The two options available are full backup and partial backup.
i. Full Backup
- Full backup files cannot be used to restore your files through the cPanel interface. You need to contact the support team for more information.
- Before you proceed with backup restore it is necessary to download and compress the backup file.
- To restore the individual portions of your website, you need to decompress the full backup file and upload it to the wizard and proceed with the restoration.
- The backup process may fail if an account is near or over its quota and the system is unable to write the necessary files such as a database lock file.
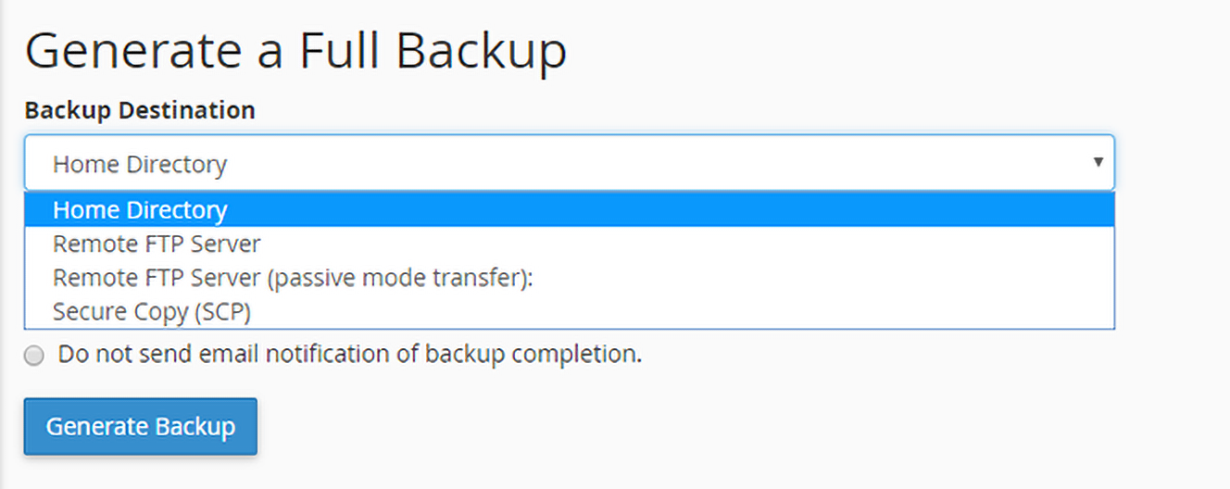
- In the Full or Partial Backup section, click Full Backup.

- From the Backup Destination drop-down, select the destination where you want the backup to be stored.
- Home directory - Saves the backup on the server.
- Remote FTP server - Saves the backup on a remote server using FTP.
- Remote FTP Server (passive mode transfer) - Saves the backup on a remote server using passive FTP.
- Secure Copy (SCP) - Saves the backup file on a remote server using SCP.

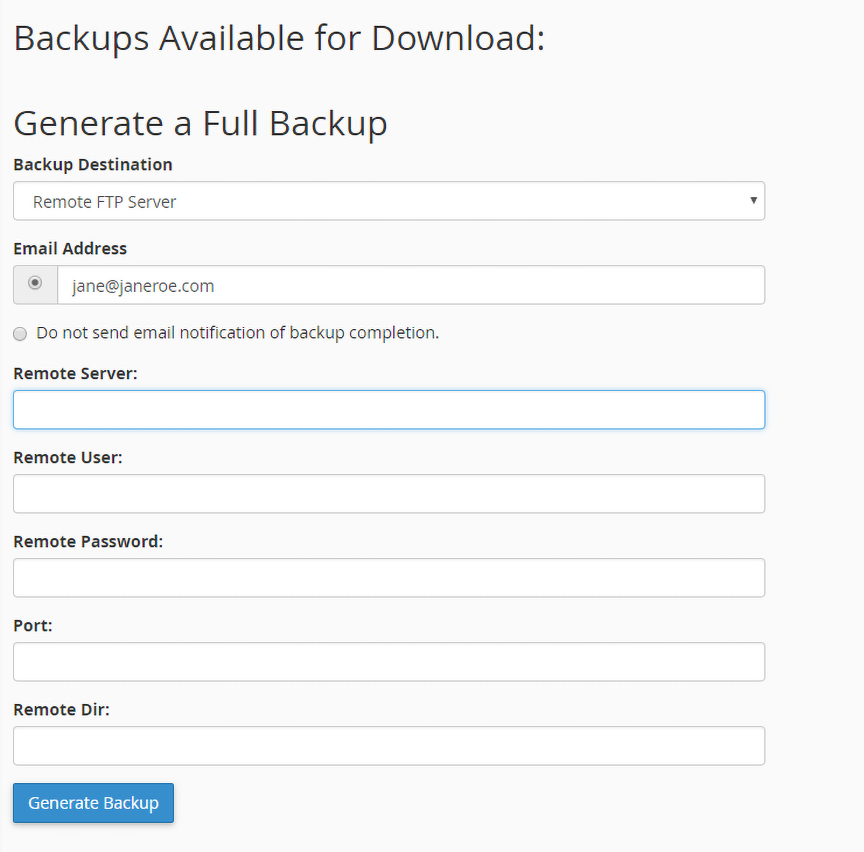
- You will have to enter the remote server information in the fields if you select the Remote FTP server, Remote FTP server (passive mode transfer) or SCP.

- Select the option to receive an email notification when the backup process finishes or select Do not send email notification of backup completion if you do not want to be notified.

- Click Generate Backup. You will see a confirmation message.
- Click Go Back to return to the Download section.
- You can download the backup by clicking on the link under Backups Available for Download.

NoteIf you selected the Home Directory option, click the filename in the Download section of the interface to download the backup file.
-
The backup file's creation date appears in the filename, which begins with a backup-MM-DD-YYYY string, where MM represents the month, DD represents the date, and YYYY represents the year.
- The system stores full backup files as tarballs that use the .tar.gz file extension.
-
ii. Partial Backup
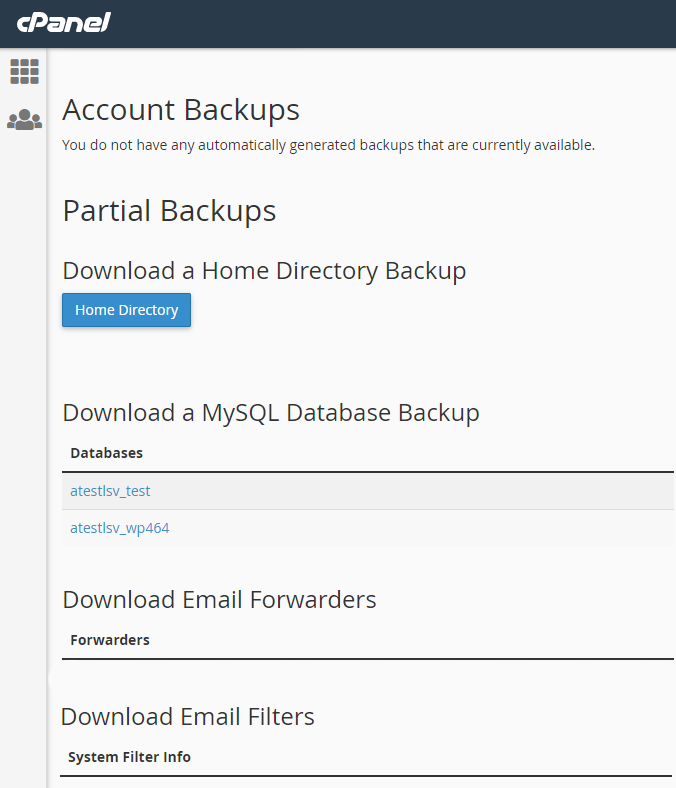
- In the Full or Partial Backup section, under Select Partial Backup select the option for which you want to create a backup.
- Home Directory - Backup your /home directory.
- My SQL Databases - Backup your databases.
- Email Forwarders & Filters - Backup your email forwarders or filters.

- You can download the respective backup by clicking on the link/button.
The partial backups downloaded will have the following file type and extension.
- Home directory - *.tar.gz.
- Email Forwarders and Filter - *.net, *.com
- My SQL Databases - *.sql
iii. Restore Backup
- Under the Account Backups section, you will see restore options.
- In the Select Restore Type section, select what you want to restore.
- Home Directory - Restores the /home directory.
- MySQL Databases - Restores your databases.
- Email Forwarders and Filters - Restores your email forwarders or filters.

- Click Choose File and select the backup file you want to restore from the path where it is downloaded.
- Click Upload to begin the backup restoration.
The backup will be restored. If you face any issues you can get in touch with our support team for assistance.